
Welcome to the Rot, Tarnished (again). Population: You (briefly)
This is the next part of our ongoing Elden Ring region series – and if you thought we’d ease you in gently after the Lake of Rot, think again. We’re staying rotten.
Let’s be honest, nobody enters Caelid on purpose the first time.
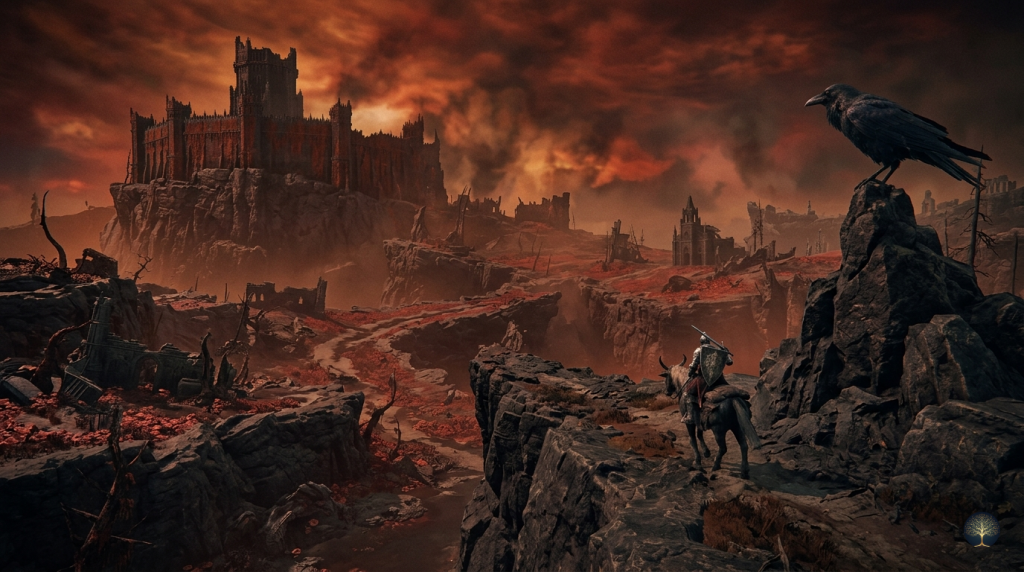
Maybe you were rummaging through a chest in the Dragon-Burnt Ruins near Limgrave, minding your own business, when the world suddenly turned red and something the size of a building tried to bite your head off. Or maybe you just followed the road east out of curiosity, confidently trotting on Torrent until the sky turned crimson and you realized, too late, that the enemies here two-shot you through full armor. Either way, the result is the same: Caelid has formally introduced itself, and the introduction was not polite.
This is Part 1 of our three-part Caelid guide series, covering everything you need to know about the southern half of the region – the lore behind this rotted wasteland, how to actually survive it, and all the key locations worth your time before heading deeper into the madness.
Why Does Caelid Look Like This?
The short version: two demigods had a very bad day
Before you start cursing the developers, it’s worth understanding that Caelid wasn’t always the festering, rot-soaked hellhole you’re looking at now. This region was the site of one of the most catastrophic battles in Elden Ring’s history – the Battle of Aeonia – fought between two of the most powerful demigods in the Lands Between: General Radahn and Malenia, Blade of Miquella.
The conflict began when Malenia and her Cleanrot Knight army marched through Liurnia and Limgrave to confront Radahn in the Caelid Wilds, where the two demigods clashed in a brutal duel that ended in stalemate. Neither could overcome the other – Radahn was simply that strong, and Malenia was simply that relentless.
Then came the moment that doomed Caelid forever. To end the standoff, Malenia snapped her Unalloyed Gold Needle – the item that had been suppressing the Scarlet Rot inside her – whispering to Radahn as she triggered her first Scarlet Aeonia bloom. The Scarlet Rot consumed Caelid entirely, and while it failed to kill Radahn, it destroyed his mind – reducing the once-feared general to a feral, wandering beast. Malenia herself fell into a deep coma and was later carried back to the Haligtree by her loyal Cleanrot Knight Finlay.
The result? A crimson sky, a rot-soaked swamp at the region’s center, and Radahn’s surviving soldiers – the Redmanes – trying to hold back the spread of the disease using fire. That’s the war you’re walking into. No pressure.
Before You Go: Survival Basics
Gear up or go home
Caelid will happily kill you in several creative ways, but Scarlet Rot is the most persistent threat. Unlike poison – which is annoying – rot builds up fast, and once the bar fills, it drains your health at a punishing rate until you cure it or die.
Here’s what you need before setting foot in the region:
Preserving Boluses are your primary cure for Scarlet Rot buildup. You can craft them once you find the Armorer’s Cookbook (6), or purchase them from some merchants. Stock up generously – you’ll burn through them quickly in the Swamp of Aeonia later.
Immunizing Horn Charm is a Talisman that boosts your Immunity stat, slowing rot buildup significantly. Worth equipping if you plan to spend real time in the swamp.
Torrent is your best survival tool in Caelid, full stop. Staying mounted means you can traverse the rot-filled swamp without accumulating buildup as quickly, and the speed advantage against most field enemies in this region is enormous. Don’t fight on foot unless you have to.
The recommended level for tackling Caelid is around 60-70. You can technically enter at any level – the game won’t stop you – but going in significantly under-leveled means you’ll spend more time running than exploring.
How to Enter Caelid
Two doors, one much worse than the other
There are two main ways players find themselves in Caelid, and one of them is a trap – albeit a very popular one for veteran players who know exactly what they’re getting into.
The long route runs along the northern road in Limgrave heading east. Follow it far enough and you’ll cross the border near the Smoldering Church – Caelid’s welcome mat, complete with an NPC invader waiting to introduce herself.
The trap route involves a chest in the Dragon-Burnt Ruins east of the First Step Site of Grace. Opening it teleports you directly into the Sellia Crystal Tunnel near the center of Caelid, surrounded by high-level enemies, with no way to fast travel until you fight your way out. Experienced Tarnished use this regularly as a shortcut – but if it caught you off guard on your first playthrough, you’ve experienced a FromSoftware rite of passage.
Key Locations: Southern Caelid
Smoldering Church
The first landmark you’ll hit on the honest route is the Smoldering Church, sitting right at the Limgrave-Caelid border. Don’t let the ruined building fool you into a false sense of security – an NPC invader named Anastasia, Tarnished-Eater, is waiting here and will attack as you approach.
Anastasia hits hard with her greataxe and moves quickly, but she’s manageable if you’re at a reasonable level. Putting her down rewards you with the Sacred Scorpion Charm Talisman and a Furlcalling Finger Remedy. Once she’s dealt with, head inside to grab the Site of Grace and loot the corpses near it – you’ll find the Missionary’s Cookbook (3) and the Nomadic Warrior’s Cookbook (14), both useful for expanding your crafting options.
Caelid Map Fragment
Don’t wander blind. The Caelid map fragment sits on a monument along the main Caelid Highway in the southern region – just follow the road east from the Smoldering Church and you’ll spot it. Grab it early and save yourself a lot of confusion.
The Sellia Crystal Tunnel
Even if you avoided the trap chest, the Sellia Crystal Tunnel is worth knowing about. It sits in central Caelid and is a solid source of Smithing Stones for weapon upgrades. The enemies inside are tough miners, but the reward makes the detour worthwhile – especially if your armaments are falling behind.
Swamp of Aeonia and Commander O’Neil
At the heart of southern Caelid sits the Swamp of Aeonia – the rot-soaked epicenter of the Battle of Aeonia, and ground zero of the disaster Malenia left behind. Commander O’Neil guards the very heart of this swamp, and while he’s optional, defeating him kicks off one of the game’s most rewarding NPC questlines.
Getting to O’Neil without rot-poisoning yourself to death requires a bit of navigation. Don’t ride straight through the swamp from the west – you’ll trigger an invasion by Millicent, an NPC who will dismount you mid-swamp and make your life considerably harder. Instead, circle around the swamp’s northern edge to reach the Inner Aeonia Site of Grace, then approach from there.
O’Neil himself is a slow-moving commander who fights with a halberd and a battle standard. At the start of the fight he summons five spectral Exile Soldiers to fight alongside him, and later calls in three additional large spirits when his health drops significantly. The key advantage here: you can fight him on Torrent, which makes this considerably more manageable than going toe-to-toe on foot. Ranged attacks and hit-and-run tactics are your friend.
Defeating him drops the Commander’s Standard – an excellent halberd – along with the Unalloyed Gold Needle, which is the key item that sets Millicent’s questline in motion.
Gowry’s Shack and Millicent
Before or after dealing with O’Neil, find Gowry – a robed NPC in a shack south of Sellia, Town of Sorcery. Gowry asks you to find a way to heal a young woman named Millicent, who is suffering from an advanced case of Scarlet Rot. The Unalloyed Gold Needle from Commander O’Neil is the key – bring it to Gowry, and after resting at a Site of Grace, he’ll repair it for you.
Take the repaired needle north to the Church of the Plague, where you’ll find Millicent resting against the wall. Give her the needle and she’ll awaken, rewarding you with the Prosthesis-Wearer Heirloom – a Talisman that raises Dexterity by five.
Millicent’s full questline stretches well beyond southern Caelid, but this is where it starts. Don’t skip it.
Cathedral of Dragon Communion
If you’ve been slaying dragons across the Lands Between and sitting on a pile of Dragon Hearts with nowhere to spend them, southern Caelid has your answer. The Cathedral of Dragon Communion in southwestern Caelid is where Dragon Communion is practiced – you can exchange Dragon Hearts here for incantations that channel draconic power.
Unlike the Church of Dragon Communion in Limgrave, the Cathedral offers the full selection of Dragon Communion incantations, making it the go-to destination for any Faith/Arcane build chasing dragon magic. One Banished Knight guards the entrance, and a Scarlet Rot-infested dragon roams nearby.
Fort Gael
Fort Gael sits in western Caelid, guarded by Redmane Knights and a pair of fire-belching Flame Chariots that make the approach immediately unpleasant. The front gate is locked, so you’ll need to circle southeast and use a tree branch as a platform to reach a back ladder – the easier way in.
Two items make this fort genuinely worth the detour. Flame, Grant Me Strength is found on a corpse at the rear of the fort, positioned between the two Flame Chariots. The incantation boosts both physical and fire damage output by 20% for 30 seconds – a flat damage buff that stacks with other buffs and remains useful well into the late game for any Strength or Faith build. If the Chariots are giving you grief, Torrent lets you dash in, grab it from the corpse, and get out before they can do much about it.
The second prize is inside the fort itself. Dropping into the inner courtyard puts you up against a Lion Guardian mini-boss, which drops the Ash of War: Lion’s Claw on defeat. Lion’s Claw is a forward-flipping slam that deals Strike damage and has excellent poise-breaking properties – one of the stronger Ashes of War available at this stage and a favourite for heavy weapon builds throughout the rest of the game.
There’s also a tower at the back of the fort containing a waygate – but that’s relevant for Part 2.
What’s Next?
Southern Caelid is punishing, but it rewards thorough exploration. You’ve now got your footing – the lore context, survival tools, and the key quests and locations you need to clean up before pushing deeper.
In Part 2, we’ll head into Sellia, Town of Sorcery, navigate Redmane Castle, and tackle the Radahn Festival itself – the single most spectacular boss fight in the base game, and one that changes the Lands Between permanently when it’s over.
Don’t say we didn’t warn you.
If you liked this post, you may want to check out Mastering Elden Ring’s Lake of Rot: A Survival Guide or our other Guides & Tips as well – have fun.
Leave a Reply