The Ash of War on Leontiel’s Greatsword is a dodge. Muleta puts you in a matador stance, and the follow-up attacks carry invincibility frames as you sidestep out of the way. A greatsword that rolls for you, then hits back.
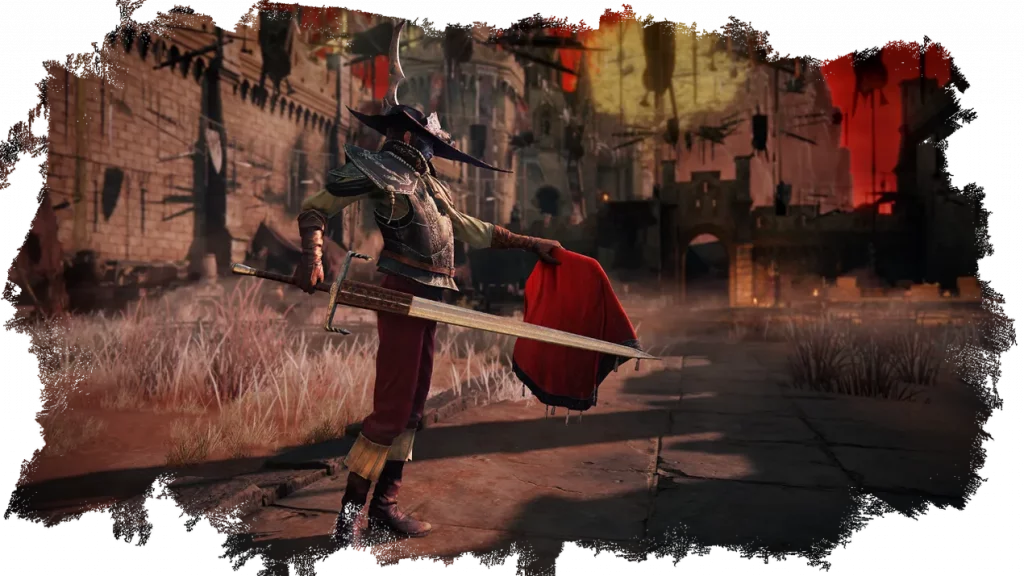
Most stance skills in this game ask you to plant your feet and commit while a boss decides whether to punish you for it. Muleta does the opposite, fellow Tarnished. It moves you first and swings second.
The Skill is the Weapon
Activate it and your character lifts the red cloth in a taunt. From there you pick a follow-up, and each one carries you somewhere:
- Light attack steps you to the left and sweeps horizontally.
- Heavy attack steps you to the right into a thrust, and you can charge it.
- A second heavy input steps right again into an upward thrust that flings smaller enemies into the air.
Those sidesteps have i-frames. You’re immune during the animation, so this isn’t a matter of hoping the hitbox sails past your shoulder. Time the flourish against a wind-up and you eat the attack for free while your counter is already traveling.
The damage type helps too. This greatsword deals standard and pierce, which means counterattack bonuses apply to it. Before you start planning a swap, though, Muleta cannot be overwritten with a different Ash of War. You take the matador or you take a different sword.
One caution from me: the temptation is to open every engagement with Muleta because it looks incredible. Don’t. It costs FP, it has a recovery window if you whiff the read, and a boss that delays its swing will catch you mid-flourish. The skill rewards patience, which is a sentence I write about roughly one weapon in twenty.
The Numbers
| Class | Greatsword (Standard/Pierce) |
| Requirements | 13 STR / 26 DEX (9 STR two-handed) |
| Scaling at base | E Strength, C Dexterity |
| Scaling at +10 | D Strength, B Dexterity |
| Basic Attack power | 130 physical, no elemental split |
| Weight | 9.5 |
| Critical | 100 |
| Guard boost | 44 |
| Skill FP cost | 10 / 13 |
| Upgrade path | Somber Smithing Stones |
The requirement to wield it is 13 Strength and 26 Dexterity, dropping to 9 Strength if you two-hand. In practice the Strength number is noise. Dexterity is the actual entry fee, and 26 is a reasonable ask by the time you have cleared Radahn.
Leontiel’s Greatsword reaches D Strength and B Dexterity at +10, which tells you everything about where your points should go. There’s no bleed, no frost, no elemental rider. It’s 130 base physical and a scaling curve, and that’s fine, because you’re not here for the passive.
It reinforces with Somber Smithing Stones, so you’re looking at one stone per level rather than the twelve-per-three-levels tax a regular armament charges you.
Where She Invades
Kill Starscourge Radahn first. There’s no shortcut around that part.
Once he’s down, Knight Leontiel invades in the Wailing Dunes, near the entrance to the War-Dead Catacombs in the northern part of the arena. Ride north from the Starscourge Radahn grace and keep going until the invasion message fires. You’ll know the spot by the stone pillars.
A few things worth knowing before it starts. Leontiel carries high poise from her plate armor and chains delayed greatsword swings into her own Muleta, which means light weapons will struggle to stagger her. Spirit Ashes, spells and consumables are all available here, since this is a field invasion rather than a boss arena. Bring the Mimic if she gives you trouble. Nobody is watching.
Beating her hands over the greatsword and the complete armor set at once. That’s Leontiel’s Hat, Armor, Leather Gloves and Boots, plus the sword. One fight, five items.
There’s a better story attached to her, though. During the Radahn Festival, Leontiel’s gold summon sign appears in the Wailing Dunes alongside the rest of the champions, so you’ll see her sign next to Blaidd, Iron Fist Alexander, Great Horned Tragoth, Lionel the Lionhearted, Okina, Finger Maiden Therolina, Castellan Jerren and Patches (who’s not a big help). You don’t have to summon her for the later invasion to happen, but you can. She’ll fight Radahn at your side and then hunt you down ten minutes later.
That isn’t an accident. Leontiel is a homage to Lucatiel of Mirrah from Dark Souls II, and the mask fixed to her ceremonial hat is modeled after Witch-Hunter Jerren, whom she regarded as something like a father. Summoning her for the festival and then meeting her blade in the dunes afterward is the most Lucatiel thing FromSoftware could have written.
The Five-Buck Asterisk
I’d rather you hear this now than three paragraphs into planning a build.
This weapon isn’t in the base game. It arrived with the Tarnished Pack, a paid DLC released on August 28, 2026 for PS4, PS5, Xbox One, Xbox Series X|S and Steam, which brings the Tarnished Edition extras to platforms that edition doesn’t ship on. Support was added to the base game by Patch 1.17 on August 27.
The Tarnished Pack is not Shadow of the Erdtree and doesn’t include it. Two separate purchases, two entirely different scales of content. And Leontiel only shows up at all if you have the pack installed, whether you bought it standalone or got it bundled inside Tarnished Edition on Switch 2. Without the pack she never shows up, and the sword doesn’t exist for you.
Five bucks is five bucks. I’m not going to pretend that’s nothing, and I’m also not going to pretend it’s a lot.
Building Around it
Your options are narrow, which makes this easy. The weapon can’t be infused or given a different affinity, so Dexterity is the only lever you have on its damage. You can’t apply grease to it either. What you swing is what you get.
Body buffs still function, so Golden Vow and Flame, Grant Me Strength remain on the table if you carry the Faith for them. Otherwise, put points into Dexterity, keep Endurance high enough for greatsword stamina costs, and stop overthinking it.
Talismans are where it gets interesting, because there are two different weapons hiding in this thing. There’s Muleta, and there’s the plain greatsword moveset you use between Muleta activations. They want different gear.
For Muleta:
- Shard of Alexander raises skill attack power by 15%, which lands on the flourish directly. Warrior Jar Shard is the 10% version of the same thing and the two can’t be worn together, so you’re picking one depending on how Alexander’s questline ended for you.
- Godfrey Icon adds 15% to charged skills, which covers Muleta’s charged heavy follow-up.
- Spear Talisman works with the pierce follow-ups and their counterattack interaction.
For the normal moveset, Axe Talisman gives 10% on charged heavy attacks. Watch the split here, because the game draws a line that the item text doesn’t. Axe Talisman covers held R2s. It also covers the charged heavies War Cry and Barbaric Roar hand you, since those are still heavy attacks underneath. It does not cover skills. Godfrey Icon sits on the other side of that line and takes the charged skills. On this weapon they do different jobs instead of overlapping.
Whichever way you lean, I’d keep one slot for Green Turtle Talisman. Eight stamina per second sounds unglamorous next to a stack of damage percentages, and it’s the one I’d protect. A greatsword drains the bar fast, Muleta adds a stance and a follow-up on top, and you need something left over to roll when you read the wind-up wrong.
If you’d rather have a defensive slot, Dragoncrest Greatshield Talisman cuts physical damage by 20%, but it’s sitting in Elphael and you’ve just finished Caelid. Grab the plain Dragoncrest Shield Talisman near the Bestial Sanctum in Dragonbarrow instead. It’s 10%, it’s a short ride from Radahn’s arena, and it’s the same family, so you can trade up later.
If you own Shadow of the Erdtree, swap something out for Rellana’s Cameo. It adds 45% to stance attacks once you’ve held the stance for a second, which is the single best fit in the game for this weapon.
The Physick
Same fork, two tears at a time.
If you’re building around Muleta, mix Greenburst Crystal Tear with Dexterity-knot Crystal Tear. Greenburst raises stamina recovery by 15 per second for three minutes, roughly double what the Green Turtle Talisman gives, and the two go after the same problem from different directions. Dexterity-knot hands you 10 levels of Dexterity for three minutes, which is the largest offensive swing a flask can give a weapon whose damage runs through one stat and nothing else.
Both are close by. Greenburst drops from the Erdtree Avatar at the Minor Erdtree in Caelid. Dexterity-knot sits on a small island in Liurnia, southwest of Boilprawn Shack.
If you’re leaning on charged heavies instead, Spiked Cracked Tear boosts charged attacks and pairs with the Axe Talisman for the same reason those two live in the same package. Add Stonebarb Cracked Tear if you want stance breaks: 30% stance damage and 30% more stamina damage against enemies who block. The catch is that it runs for 30 seconds, so treat it as a burst you spend deliberately rather than a buff you drink at the fog gate and forget about.
And when you’re still learning a boss, Opaline Hardtear raises every damage negation type by 15% for three minutes, dropping to 10% in PvP, and stacks with talismans, consumables and spells. I’d run it alongside Greenburst and swap back to Dexterity-knot once you know the moveset. There’s a small irony in loading defensive stats onto a weapon that grants invincibility frames, but nobody reads a boss correctly on the first attempt.
Two of these come off Putrid Avatars in the Caelid and Dragonbarrow corner of the map, near the Minor Erdtree by Fort Faroth. You’ll be in the neighborhood anyway.
Who Should Skip This
Short list. If you aren’t willing to put 26 into Dexterity, the weapon isn’t for you and the numbers will never come together. If you play greatswords because you like winding up and trading hits, Muleta is wasted on you and there are better colossal options. And if you only own the base game and the idea of paying for a five-euro pack irritates you on principle, that’s a completely reasonable position to hold.
Everyone else should get it. Nothing else in the Tarnished Pack is this mechanically interesting, and it isn’t close. A stance skill that grants i-frames is the sort of tool that changes how you approach a boss rather than just how fast you delete it. Go fight the woman who helped you kill Radahn. She’ll understand.
Leave a Reply