
Welcome back to the Lands Between, where the shadows stretch long and the Erdtree looms larger than ever! With the release of the Shadow of the Erdtree DLC, players are diving into a world brimming with fresh challenges, formidable foes, and tantalizing treasures. As you embark on this new adventure, one thing becomes crystal clear: having the right build can make all the difference between triumph and tragedy – so nothing has changed here.
Whether you’re a seasoned Tarnished or a newcomer eager to carve your path, optimizing your character’s build is crucial for navigating the treacherous landscapes and engaging in epic battles that this DLC offers. From devastating melee attacks to cunning sorcery and everything in between, there’s a wealth of strategies waiting to be uncovered.
In this mini series, we’ll explore some of the best new builds tailored specifically for Shadow of the Erdtree. Let me give you a little sneak preview:
- The Thrusting Shield Build
- The Deflecting Hardtear Build
- The Arcane Bleed Build
- The Lightning Build
- The Great Katana Strength/Dexterity Build
- The Finger Sorcery Mage Build
- The Faith-Based Tank Build
- The Scarlet Rot Build
Each build is designed to maximize your effectiveness against new enemies and bosses while showcasing the exciting mechanics introduced in this expansion. That being said, this actually indicates that these builds are most usable in a New Game Plus (NG+) or relatively late in the DLC. So grab your weapons, don your armor, and let’s dive into the art of character optimization in Elden Ring’s latest chapter and explore the first two builds!
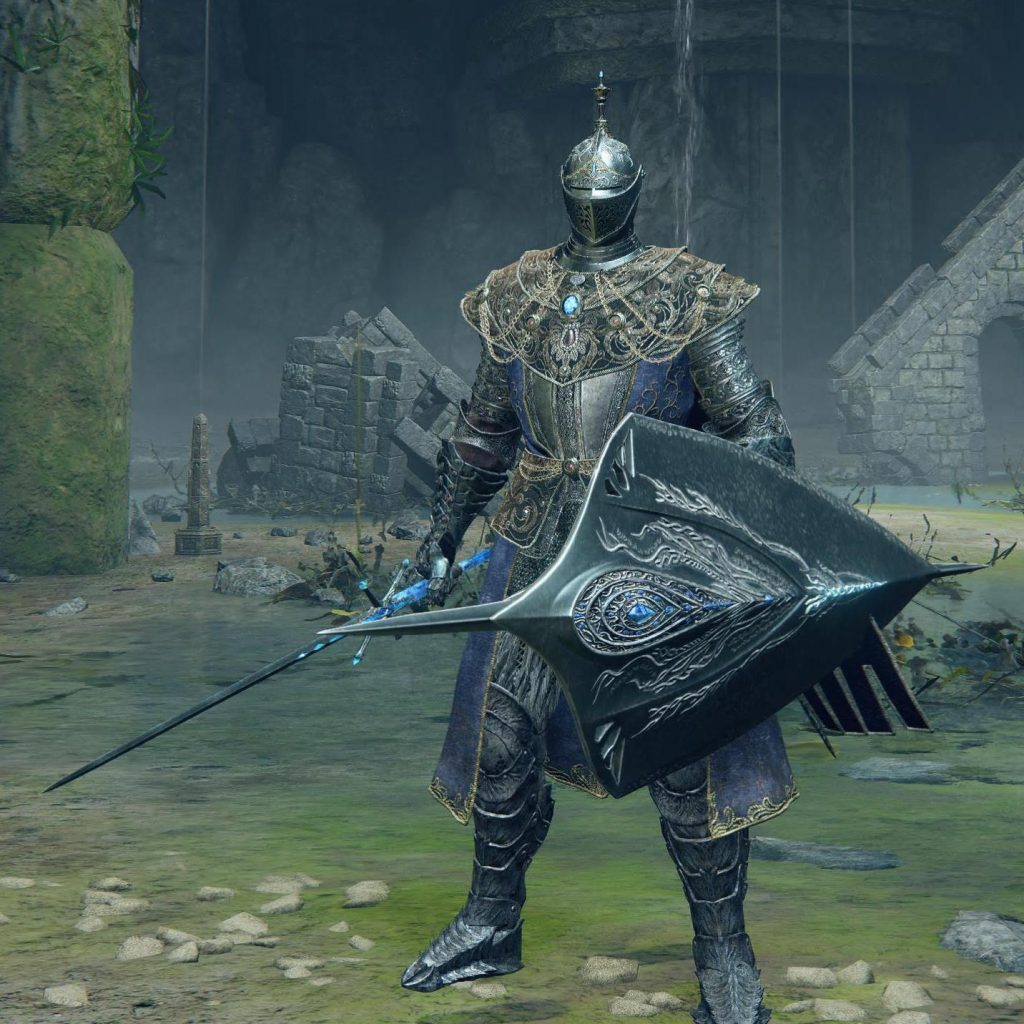
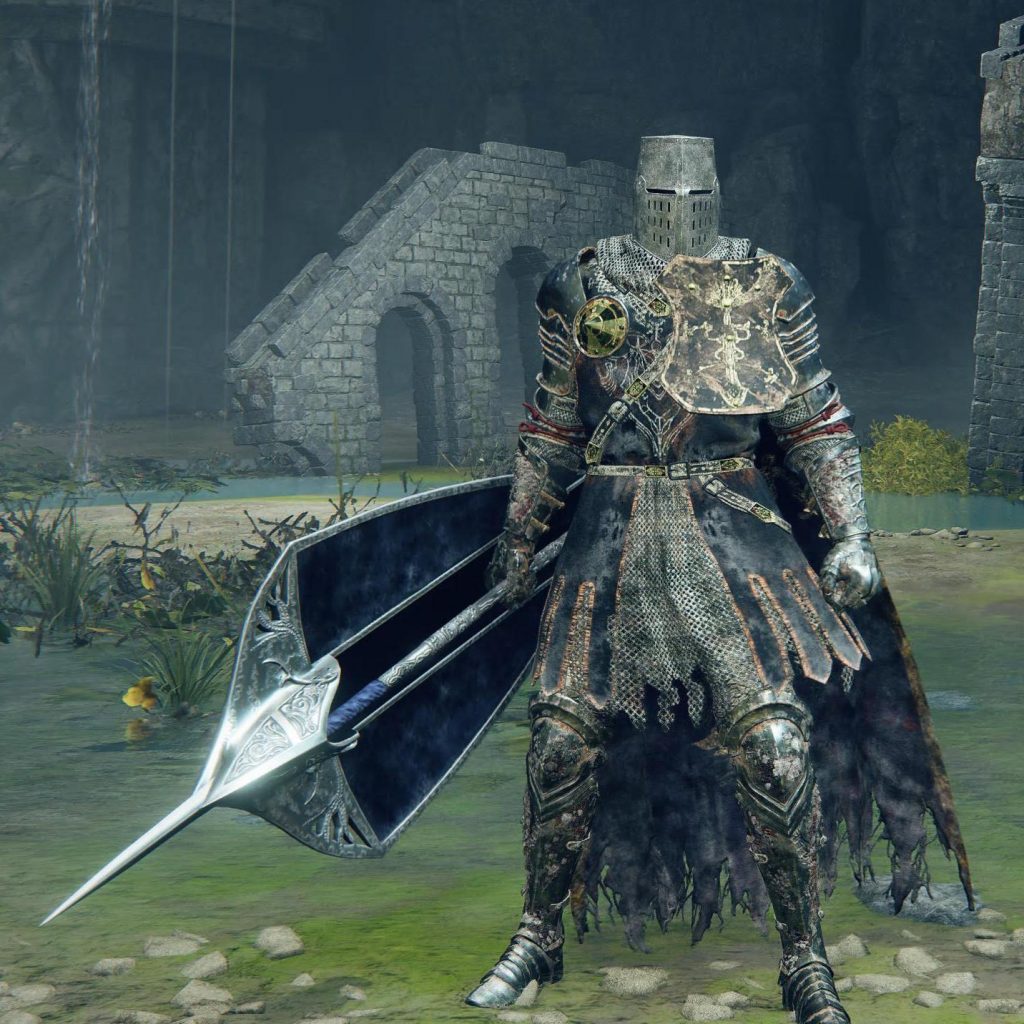
The Thrusting Shield Build
If you’re looking for a unique and powerful build in Elden Ring’s Shadow of the Erdtree expansion, look no further than the Thrusting Shield. This often-overlooked weapon type offers a perfect blend of offense and defense that can revolutionize your gameplay. Let’s dive into why you should consider wielding one of these bad boys in your next playthrough.
Guard & Attack Simultaneously
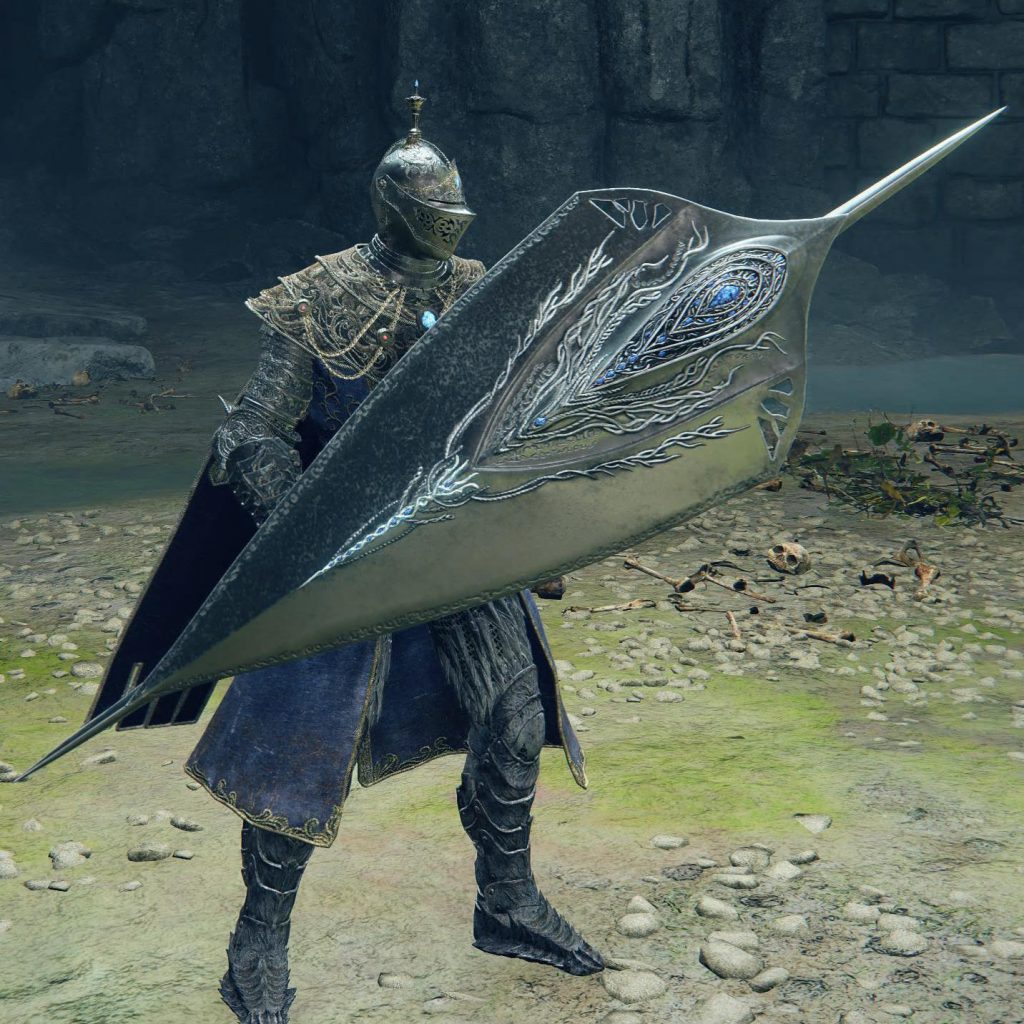
First off, let’s talk defense. Thrusting Shields, like the fan-favorite Carian Thrusting Shield, that we are using for this build, are absolute tanks. With a guard boost of 64 and 94% physical damage negation, you’ll be shrugging off hits like they’re nothing. And the best part? They’re surprisingly light for their defensive prowess, so you won’t be fat-rolling all over the Lands Between.But here’s where it gets really interesting: these shields aren’t just for turtling. Oh no, they’ve got some serious offensive chops too. Imagine being able to poke your enemies with piercing damage while still hiding behind your shield. It’s like having your cake and eating it too! Plus, you can slap on various Ashes of War to really customize your playstyle.
Versatility of the Carian Thrusting Knight
The versatility of this build is truly something to behold. Whether you’re a strength junkie looking to max out your damage, an intelligence build wanting to leverage that sweet innate magic damage on the Carian Thrusting Shield, or a faith build looking to mix in some incantations, there’s a Thrusting Shield build for you. And let’s not forget about stance breaking. Those repeated pokes are great for wearing down enemy postures, setting you up for some juicy critical hits.
In the end, what really sets the Carian Thrusting Knight apart is its unique gameplay. It’s a playstyle that keeps you constantly engaged, always balancing offense and defense in a way that few other builds can match. Whether you’re exploring the new areas of Shadow of the Erdtree or facing off against other players, a Thrusting Shield build can give you that edge you need to come out on top.
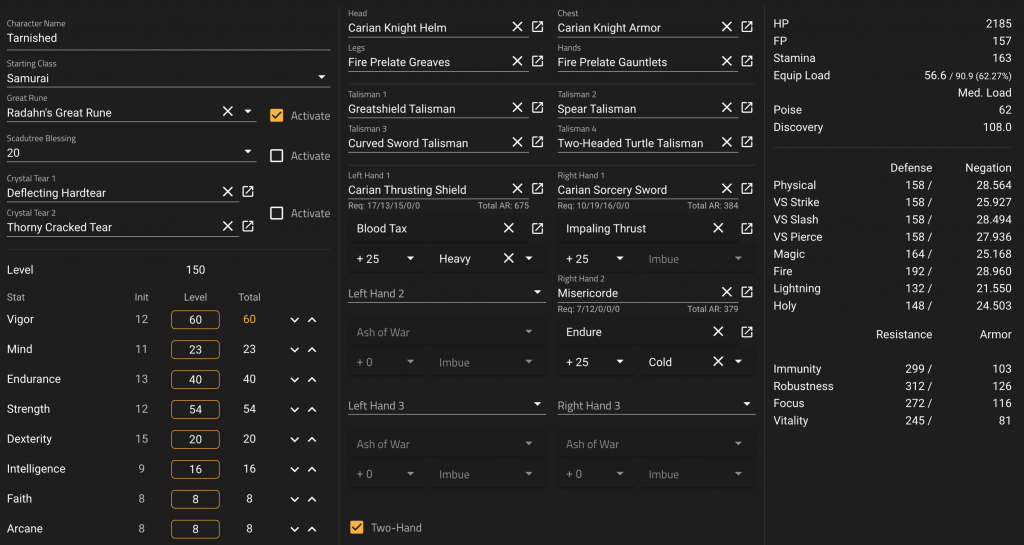
Key Equipment
- Weapons:
- Main: Carian Sorcery Sword for casting “Scholar’s Shield” and, first of all, to fit the build perfectly. As 2nd weapon you could equip Miséricorde with “Endure” to tank through the enemy’s attack and use the benefits of an Ash of War on the Thrusting Shield that has successive attacks.
- Off-hand: Carian Thrusting Shield
- Shield: None (Carian Thrusting Shield serves as both weapon and shield)
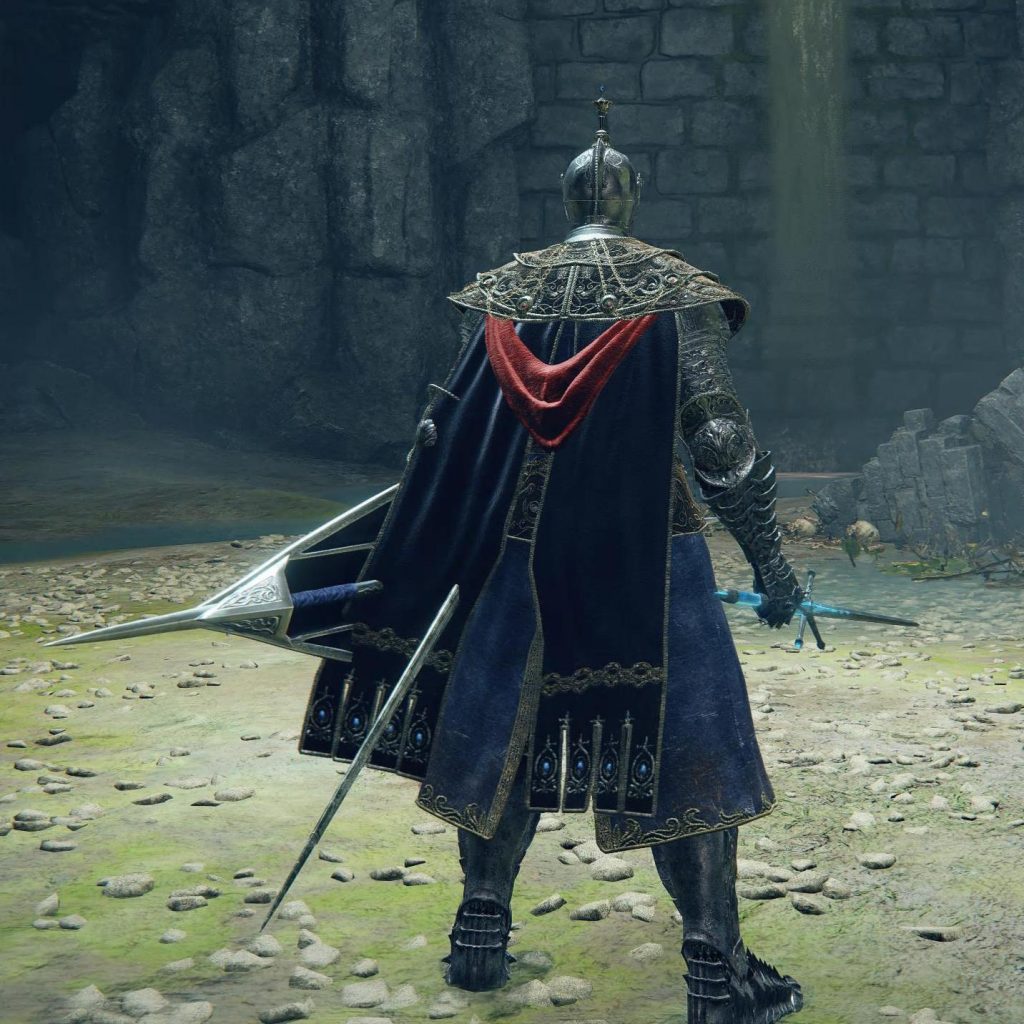
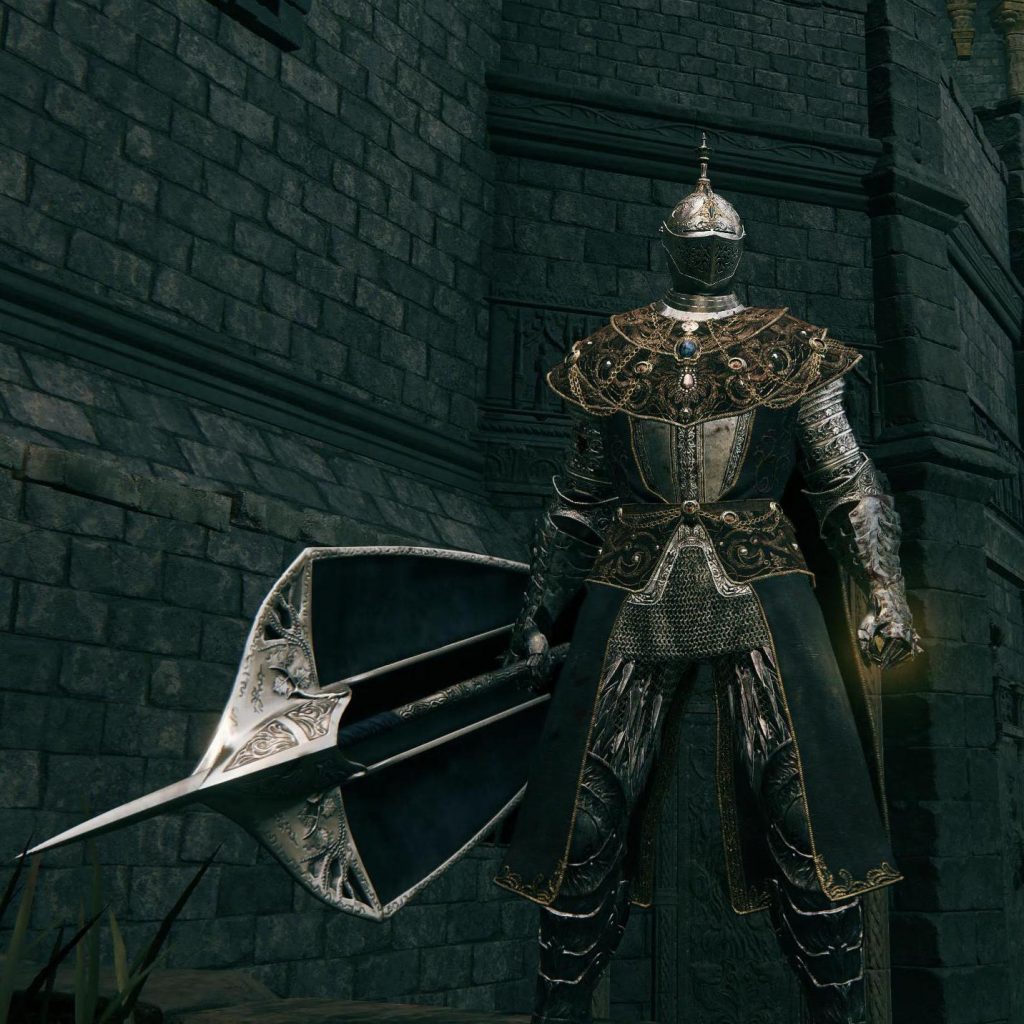
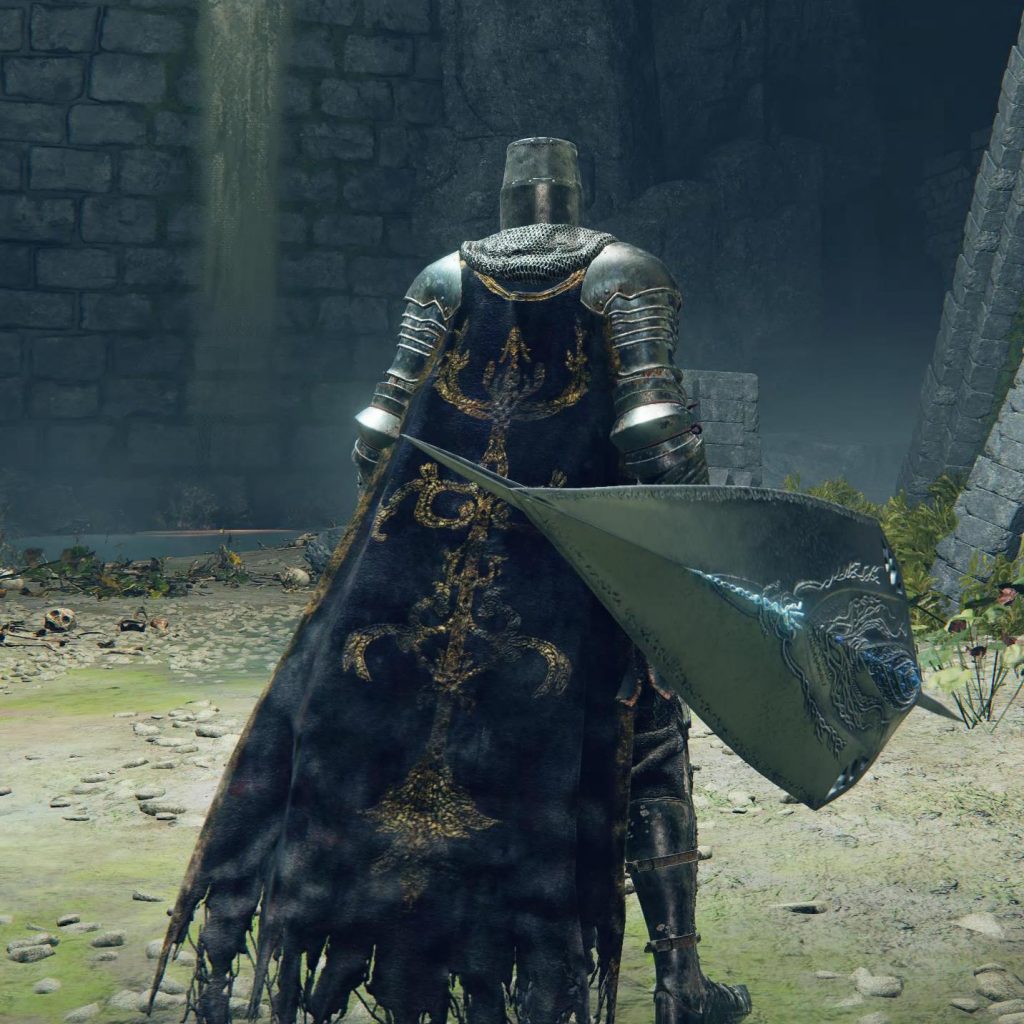
- Armor: As always: use the heaviest armor you can wear while still maintaining a medium roll. However, here are two armor combinations for you to think about (yes, you can go heavier):
- Carian Knight Helm, Carian Knight Armor, Fire Prelate Greaves, Fire Prelate Gauntlets – as we are using the Carian Thrusting Shield some Carian Knight armor seems to be appropriate for the build. Poise: 62
- Greathelm, Gelmir Knight Armor, Scaled Greaves, Scaled Gauntlets – just to give you one more option. Poise: 60.
- Talismans:
- Greatshield Talisman
- Spear Talisman
- Curved Sword Talisman
- Two-Headed Turtle Talisman
- Flask of Wondrous Physick:
- Deflecting Hardtear” to enable Perfect Blocks for 5 minutes, for further enhancing your defensive capabilities
- Thorny Cracked Tear” to boost your damage with successive attacks, by 9%, 13%, and 20%.
- Alternatively use the “Stonebarb Cracked Tear” for a higher chance to break your enemies stance.
Stat Distribution (Level 150)
- Vigor: 60
- Mind: 23
- Endurance: 40
- Strength: 54
- Dexterity: 20
- Intelligence: 16
- Faith: 8
- Arcane: 8
Strategy
The core strategy of this build revolves around the unique capabilities of the Carian Thrusting Shield. Two-hand the shield to maximize its offensive potential while maintaining its defensive capabilities. Use regular attacks to deal damage while simultaneously blocking incoming attacks. The high Endurance allows for sustained offense and defense. In order to apply “Scholar’s Shield” we’re carrying our main weapon in the off-hand.
Utilize Guard Counters frequently, as they’re particularly effective with this weapon type. The Curved Sword Talisman enhances these counters by 20%, making them even more potent. The Spear Talisman boosts thrusting-weapon counter-attacks by 15%, which synergizes well with the thrusting nature of your attacks.
The Greatshield Talisman further enhances your blocking capabilities, while the Two-Headed Turtle Talisman helps with stamina regeneration, crucial for maintaining your aggressive defense.
Advanced Tactics
- I found “Repeating Thrust” and “Blood Tax” (both in Heavy affinity to keep that 94% physical damage negation) useful, as they have successive attacks, what works nice with the “Thorny Cracked Tear”. You could also think about using the Ash of War “Gragblade” in Heavy affinity to increase Physical damage by 15% and Stance damage by 10%.
- Against tough enemies, cast “Scholar’s Shield” before two-handing your Thrusting Shield to maximize your Guard Boost. This reduces the stamina damage you take while blocking by 35% and stacks with the “Greatshield Talisman”. Unfortunately, it will not work in combination with “Gragblade”.
Where to Find the Carian Thrusting Shield
The Carian Thrusting Shield can be found in the Shadow Keep Back Section. From the Shadow Keep Back Section Site of Grace, head west along the path until you reach the end, where you’ll find the shield.
This build offers a unique playstyle that excels in both offense and defense, making it an excellent choice for tackling the challenges of Shadow of the Erdtree.
The Deflecting Hardtear Build
The Deflecting Hardtear Build is a game-changing strategy introduced in Shadow of the Erdtree, offering a unique blend of offense and defense that can trivialize even the toughest encounters. It shares quite some aspects with The Thrusting Shield Build, as it uses similar Chrystal Tears in the Flask of Wondrous Physick and even most of the Talismans. However, with the Black Steel Greathammer as main weapon this is a totally different breed, as you will learn now.
Build Overview
Let’s break down the ideas behind this build in detail.
The Sacred Black Steel Sentinel
Are you tired of being pushed around in the Lands Between? Want to turn the tables on your foes with a build that’s both an immovable object and an unstoppable force? Well, Tarnished, have I got a treat for you! Let’s talk about the unholy (or should I say holy?) matrimony of the Deflecting Hardtear and the Black Steel Greathammer infused with Sacred Blade that results in the “Sacred Black Steel Sentinel“.
Become the Ultimate Defensive Powerhouse
First up, the Deflecting Hardtear. This little miracle in a bottle is your ticket to becoming a walking, talking fortress. Time your blocks just right, and you’ll be shrugging off attacks like they’re nothing more than gentle breezes. And the best part? Your stamina bar will thank you, leaving you with plenty of juice for some righteous retaliation.
Bring the Holy Hammer Down
Speaking of retaliation, let’s chat about your new best friend: the Black Steel Greathammer. This bad boy isn’t just for show – it’s a stagger machine. Infuse it with Sacred Blade, and you’ve got yourself a holy wrecking ball. Those guard counters? They’re not just counters anymore; they’re divine judgments, capable of staggering even the burliest of baddies. We will illuminate this beauty in detail just in a few moments.
When Defense Meets Offense
Now, here’s where the magic happens. Combine the Deflecting Hardtear’s guard-boosting prowess with the hammer’s holy-infused might, and you’ve got a build that turns defense into the best offense. Successfully deflect an attack, and your guard counter becomes a holy smackdown, dealing up to 40% more damage if you’ve got the Curved Sword Talisman in your pocket.
Versatility is Key
The beauty of this build? It’s not a one-trick pony. Whether you’re facing down hordes of enemies in PvE or squaring off against crafty invaders in PvP, you’ve got the tools to adapt. Two-hand that hammer for maximum bonk, or pair it with a shield for the ultimate turtle-and-smash strategy.
Spice It Up
And for those of you who like to add a little extra flavor to your builds, throw in some faith-based incantations. Nothing says “divine retribution” quite like following up a perfectly timed deflect with a lightning spear to the face.
This build lets you stand your ground, dish out holy justice, and look absolutely badass while doing it. Give it a try, and soon you’ll be singing, “Can’t touch this!” all the way through the Lands Between and the Realm of Shadow. Just remember: with great power comes great responsibility… to absolutely demolish your enemies!
The Black Steel Greathammer
Now, let’s have a closer look at the main weapon of our build. The Black Steel Greathammer is the weapon of choice for us and the enigmatic Black Knights who serve Messmer the Impaler. Its appearance is striking, crafted from black steel and adorned with elegant gold embellishments. What sets this weapon apart is the Erdtree incantation blessing it carries, hinting at its divine origins. If you’re itching to get your hands on this beast, you’ll need to defeat the black knight at the Church of Consolation in the DLC area.
In terms of gameplay, the Black Steel Greathammer shines with its unique features. It has a Holy Amplification property, meaning that when you imbue it with additional holy power, its strength increases significantly. But that’s not all – its guard counter effect is where it truly stands out. When you perform a guard counter, it triggers a burst of holy power, dealing extra holy damage to your foes.
Stat-wise, this weapon primarily scales with Strength, Dexterity and Faith. That’s why for faith-based builds, this weapon is a dream come true. It synergizes beautifully with holy buffs and incantations, allowing you to unleash devastating combinations of physical and holy damage.
By default, the Black Steel Greathammer comes with the “Endure” weapon skill and it’s not a bad choice to keep it this way, but we’re swapping it with the “Sacred Blade” Ash of War for a significant increase of the weapon’s power.
In combat, the Black Steel Greathammer truly shines in our guard counter build. The holy burst effect that follows your guard counters can catch enemies off guard and deal significant damage. Interestingly, Flame Art infusion can result in higher damage output compared to a Sacred infusion against certain enemies, so don’t be afraid to experiment with different infusions.
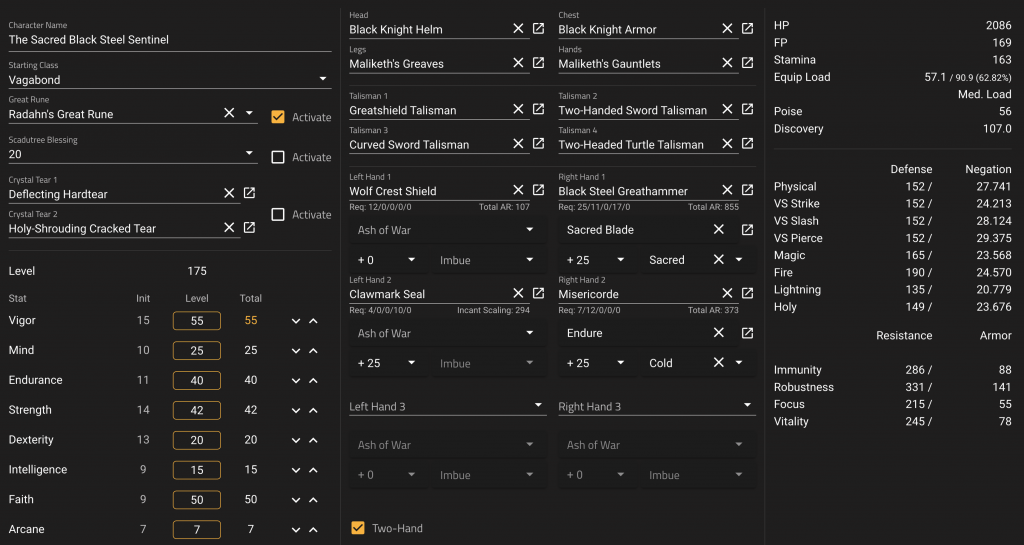
Key Equipment
- Weapon: Black Steel Greathammer with Sacred Blade
- Shield: Actually, none is required (two-hand your weapon), but having a shield while exploring the area might come in handy. You could opt for the “Wolfcrest Shield” and level it up to its maximum for the extra guard boost. Alternatively, you could choose the “Black Steel Greatshield” for a perfect mix of style, although it requires 2 more points in Endurance for a medium roll.
- Armor: Black Knight Helm, Black Knight Armor, Maliketh’s Greaves, Maliketh’s Gauntlets. Poise: 56. This combination matches the theme of the build nicely with colors in black and gold.
- Seal: Clawmark Seal
- Talismans:
- Curved Sword Talisman
- Greatshield Talisman
- Two-Handed Sword Talisman or Dagger Talisman
- Two-Headed Turtle Talisman
- Flask of Wondrous Physick:
- Deflecting Hardtear
- Holy-Shrouding Cracked Tear for a 20% increase of holy damage that lasts 3 minutes or Stonebarb Cracked Tear for 30 seconds of 30% increase in stance damage.
Stat Distribution (Level 175)
- Vigor: 55
- Mind: 25
- Endurance: 40
- Strength: 42
- Dexterity: 20
- Intelligence: 15
- Faith: 50
- Arcane: 7
Strategy
The core of this build revolves around the Deflecting Hardtear, which grants you the ability to perform “Perfect Blocks” for 5 minutes after consumption and the unique guard counter of the Black Steel Greathammer. This allows you to deflect attacks Sekiro-style, drastically reducing damage and stamina drain when blocking, as well as very powerful counter attacks.
Two-hand your weapon to maximize damage output while still being able to block effectively. Time your blocks just before an attack lands to activate the Perfect Block. This not only negates most damage but also sets you up for devastating guard counters.
The Curved Sword Talisman stacks with the Deflecting Hardtear’s guard counter boost, increasing your counter-attack damage by an additional 20%. Use these powered-up guard counters to quickly break enemy stances, opening them up for critical hits enhanced by the Dagger Talisman (if you have it equipped).
Advanced Tactics
- The Deflecting Hardtear effect works on both melee and ranged attacks, including spells. Practice timing your blocks against various enemy types.
- As an alternative, use the Stonebarb Cracked Tear in your Physick to break enemy poise even faster, though be aware its duration is way shorter than the Deflecting Hardtear’s.
- Consider using Flame-Art Affinity on the Greathammer for adding another layer of damage to your attacks.
- Opt for 60 Vigor if you have earned more runes to spend and think about activating Radahn’s Great Rune for a nice boost in HP (1814 -> 2086), FP (147 -> 169) and Stamina (142 -> 163).
- With 50 Faith you can equip quite some potent incantations to make your survival in Elden Ring easier.
Where to Find the Deflecting Hardtear
The Deflecting Hardtear is dropped by a Furnace Golem in the Gravesite Plain, near the Scorched Ruins. This is likely one of the first golems you’ll encounter in the DLC area.
This build offers an incredibly potent defensive option while maintaining high offensive capabilities, making it an excellent choice for both newcomers and veterans tackling the challenges of Shadow of the Erdtree.
Time to Get Your Hands Dirty, Tarnished
Now that you’ve got the lowdown on these two unconventional yet powerful builds, it’s time to put them to the test! Whether you choose to become a shield-thrusting maestro or a spell-deflecting, hammer-wielding juggernaut, your adventures in the Lands Between are about to get a whole lot more exciting.
But don’t just take my word for it – give these builds a try and see for yourself! And hey, we’re all in this together, so why not share your experiences? Have you tried either of these builds before? Did you discover any cool tricks or strategies? Or maybe you’ve got your own unique twist on these setups?
Drop a comment below, if you like and let us know how these builds worked out for you. Did you manage to take down that boss that’s been giving you trouble? Or perhaps you’ve got some epic PvP stories to share? Your fellow Tarnished are eager to hear about your triumphs (and even your hilarious failures)!
Final Words
With these two builds in your arsenal, you’re not just ready for the Lands Between – you’re practically begging for a fight with the likes of Messmer himself! Whether you’re poking gods with your magical shield or playing whack-a-mole with your sacred hammer, you’re in for one heck of a ride.
So, what are you waiting for? Grab that Carian Shield or that Black Steel Greathammer, and get ready to paint the Erdtree red with the blood of your enemies! Trust me, even the Two Fingers will be giving you a thumbs up (… or would that be a Fingers up?).
But hold onto your Torrent, because this wild ride isn’t over yet! Stay tuned for the next part of this mini-series, where we’ll be serving up two more builds so spicy, they’ll make Mohg’s blood magic look like a gentle summer breeze.
If neither of the two builds was to your liking, you may want to check out another build that I introduced recently: The Phantom Lancer Build – In Heavy Swords We T(h)rust.
Leave a Reply