
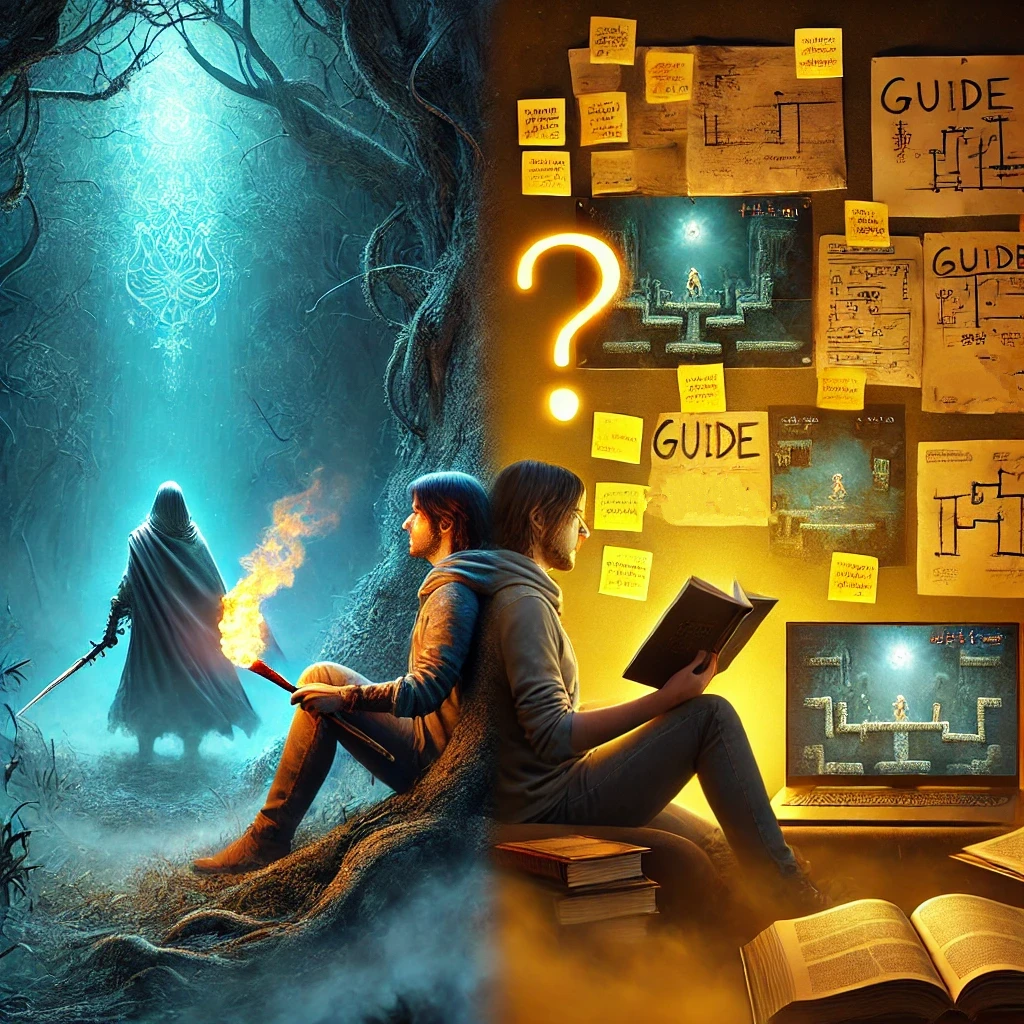
As a longtime Elden Ring player who has both benefited from and occasionally regretted using guides, I’ve developed a complex relationship with these resources. Curse and blessing perfectly captures this duality.
The Lands Between are vast, and so is the ecosystem of guides that has sprung up around FromSoftware’s masterpiece. While there are countless types of guides available – from PvP tactics to lore explanations and achievement hunting – I’ll focus on some key categories that most players encounter on their journey.
Oh, before I forget, it feels only fair to warn you: SPOILERS AHEAD! This article discusses specific bosses, locations, and mechanics that you might want to discover on your own.
Let me take you through these various types of guides and explore when they enhance the experience versus when they might diminish it.
Mechanic Explanation Guides: The Foundation
These guides break down Elden Ring’s complex and often obscure systems – from stat scaling to status effects, crafting to combat techniques.
Blessings:
- They demystify mechanics that the game purposely leaves unexplained
- They prevent hours of frustration over misunderstood systems
- They help you avoid making irreversible character building mistakes
Take Poise, for example. Unlike previous Souls games, Elden Ring’s Poise system works completely differently, affecting whether you get staggered during attacks. Without a guide explaining this, you might waste points in Endurance thinking it improves your Poise when only armor values truly matter. Similarly, the game never explicitly tells you the equipment load breakpoints (Light/Medium/Heavy) that drastically affect your dodge roll quality, leaving many players wondering why they suddenly started “fat rolling.”
Curses:
- They can remove the joy of discovery that comes from experimenting with different approaches
- Learning about Status Effect buildup mechanics (like Bleed, Frost, and Scarlet Rot) can make these effects feel more like math problems than mysterious threats
Build Guides: The Character Blueprints
These guides offer step-by-step instructions for creating specific character types, from bleed-focused dexterity builds to intelligence-heavy sorcerers.
Blessings:
- They provide clear paths for newer players uncertain about attribute distribution
- They help players experience different playstyles they might not have considered
- They can reveal synergies between weapons, armor, and spells that aren’t obvious
For instance, without guides, many players would never discover the devastating “Comet Azur + Cerulean Hidden Tear” combo that allows mages to one-shot many bosses with an unlimited FP laser beam. Similarly, the infamous “Rivers of Blood” katana build that dominated PvP for months relied on specific Arcane/Dexterity stat distribution that wasn’t intuitive for many players.
Curses:
- They can lead to “meta” homogenization, where everyone runs identical builds
- They often focus on optimization at the expense of personalization
- Following them too closely can prevent you from developing your own playstyle identity
The “Fingerprint Shield + Spear” setup became so prevalent in PvP that it created a monotonous experience where everyone used the same nearly impenetrable defensive strategy, all because build guides widely promoted it.
Boss Strategy Guides: The Battle Plans
These specialized guides break down boss fight mechanics, weaknesses, and optimal strategies for Elden Ring’s numerous challenging encounters.
Blessings:
- They provide hope when facing seemingly impossible roadblocks like Malenia or Promised Consort Radahn
- They reveal critical weaknesses and opportunities that might take dozens of deaths to discover
- They can prevent players from abandoning the game entirely at particularly difficult bosses
The Waterfowl Dance attack from Malenia, Blade of Miquella, is perhaps the perfect example. This devastating flurry can seem completely unavoidable until you learn the precise dodge timing and positioning from a guide. Similarly, discovering that you should concentrate your attacks on the Fire Giant’s left ankle in the first phase and on his hands in the second phase can transform seemingly impossible fights into manageable challenges.
Curses:
- They rob players of the hard-earned satisfaction that comes from mastering a boss through trial and error
- They can spoil dramatic boss reveals and special mechanics
- They flatten the emotional journey of triumph after struggle
Watching a guide that reveals using Bewitching Branches for turning Niall’s summoned knights against him, significantly simplifying the fight transforms what could be an epic battle into a mechanical exercise. Learning that you can cheese Mohg, Lord of Blood with Purifying Crystal Tear bypasses the intended challenge of dealing with his Nihil blood ritual.
Farming/Progression Guides: The Fast Track
These guides focus on efficient methods to acquire runes, upgrade materials, and progress through the game more quickly.
Blessings:
- They help players recover lost runes after deaths or reach desired level goals
- They reduce unnecessary grinding when stuck on difficult content
- They provide access to crucial upgrade materials that might otherwise be missed
The infamous Palace Approach Ledge-Road bird farming spot revolutionized how many players experienced the game, allowing quick access to levels that made earlier content more manageable. Similarly, guides that map out where to find all Smithing Stone Bell Bearings ensure players can upgrade their weapons appropriately instead of being stuck with underpowered gear.
Curses:
- They can dramatically alter the intended difficulty curve of the game
- They sometimes exploit unintended mechanics that feel like cheating
- They can lead to overleveling that removes all challenge from areas
When players follow the Varre questline early specifically to access Mohgwyn Palace for rune farming, they often become drastically overleveled, turning what should be challenging mid-game content into a trivial experience. The same happens when guides direct players to the Caelid dragon for easy early runes.
Comprehensive Walkthrough Guides: The Complete Roadmap
These exhaustive guides detail every location, item, boss, and quest in the game, often in a linear fashion.
Blessings:
- They ensure you don’t miss critical items or NPCs in this vast open world
- They can help you navigate particularly confusing areas or quests
- They provide solutions when you’re genuinely stuck and about to quit in frustration
Ranni’s questline spans multiple regions and includes easily missable steps like finding Miniature Ranni at Ainsel River or needing to speak to her doll form three times at a specific Site of Grace. Without a guide, many players abandon this questline and miss out on one of the game’s most impactful endings. Similarly, when facing the confusing layout of Leyndell Sewers, a guide can prevent the frustration of hours spent running in circles trying to find Mohg, the Omen.
Curses:
- They fundamentally alter the game’s core exploration experience
- They transform the thrill of discovery into a checklist of tasks
- They can rob you of the satisfaction that comes from overcoming challenges independently
Discovering Mohgwyn Palace on your own by following White Mask Varré’s cryptic questline feels genuinely rewarding, but following a guide to “get there early for rune farming” turns a mysterious hidden realm into just another checkpoint. The same goes for finding the Mimic Tear in Nokron – stumbling upon arguably the game’s most powerful spirit ash feels like a genuine treasure hunt, while following guide directions makes it just another item to collect.
NPC Quests: The Hidden Stories
Blessings:
- They prevent accidentally failing quests through unintuitive progression triggers
- They help you experience the full narrative that FromSoftware carefully crafted
Alexander the Pot’s multi-region quest requires specific actions and revisiting previous areas in a sequence that’s easy to miss without guidance. Boc the Seamster’s questline is even more subtle, with a heartbreaking outcome if you make what seems like the obvious choice (giving him a Larval Tear).
Curses:
- They remove the organic discovery of the game’s rich character stories
- They convert narrative discovery into mechanical task completion
- They can spoil emotional story beats that would have more impact if discovered naturally
Difficult Areas: When Temptation Strikes
The decision to use a guide often comes at specific pain points – those notoriously challenging areas where frustration peaks. These moments test a player’s guide philosophy most intensely.
The Lake of Rot exemplifies this perfectly. This scarlet-infested underground lake rapidly inflicts Scarlet Rot with each step, leaving unprepared players stranded without countermeasures. Many first-timers wonder “surely I’m missing something here?” Yet those who push through without assistance discover strategic platforming routes and the value of specific incantations, creating a genuine feeling of triumph against the odds.
Similarly, Farum Azula’s complex vertical design with its deceptive pathways makes navigation extremely challenging. The Subterranean Shunning-Grounds beneath Leyndell, with its labyrinthine sewers and hidden passages, has driven countless players to guides after running in circles for hours. The Haligtree combines toxic swamps, precarious platforming, and some of the game’s most aggressive enemies, culminating in the notorious Malenia fight.
These difficult areas force us to confront our relationship with challenge. Is independent discovery worth hours of potential frustration? Your response to these extreme challenges reveals much about your personal gaming philosophy.
Personal Reflections: Finding the Balance
In my own Elden Ring journey, I’ve found that the most rewarding approach is selective guide usage. When I first entered the Lands Between, I allowed myself to get completely lost – stumbling into horrifying bosses I wasn’t prepared for, finding mysterious items I didn’t understand, and making plenty of mistakes. Those early hours had my heart pounding with each new discovery, each horizon revealing something both beautiful and terrifying. There’s a reason why so many players, when asked what game they wish they could experience again for the first time, overwhelmingly answer “Elden Ring.” That initial journey through an unknown world, where genuine surprise and wonder await around every corner, is simply irreplaceable.
Only after hitting genuine roadblocks would I turn to mechanic guides to understand specific systems. I consulted build guides only for inspiration rather than rigid templates. And I reserved comprehensive walkthrough guides for specific situations – like when I’d explored an area thoroughly but couldn’t find a critical item, or when a cryptic NPC quest had me completely baffled.
Perhaps the best approach is treating guides as resources rather than instructions – consulting them when your enjoyment is at risk, but giving yourself the gift of discovery whenever possible. After all, you only get to experience Elden Ring for the first time once.
The true blessing of Elden Ring is the sense of wonder and accomplishment that comes from venturing into the unknown. The curse would be robbing yourself of that experience by turning the journey into a guided tour.
Your Turn: The Guide Challenge
Now I want to hear from you! How do you approach guides in Elden Ring and other FromSoftware games? Do you go in completely blind, or do you keep a wiki tab open at all times?
Share your guide philosophy in the comments below:
- What was your most satisfying discovery that you found without a guide?
- Has a guide ever ruined an experience for you? How?
- Which boss gave you the most satisfaction to defeat without help?
- Do you have a personal rule about when to use guides and when to struggle?
Remember, there’s no wrong way to play Elden Ring – but being mindful about how and when you use guides might just help you discover the perfect balance between frustration and triumph in the Lands Between.
For further in-game guides packed with useful information check out our category Guides & Tips.
Leave a Reply